Below is a step-by-step guide on how to setup the integration of your transaction data with Morescope if you are using Fortnox as your ERP provider
Fortnox – in the heart of business life Fortnox empowers businesses to launch, grow, and thrive. Through cutting-edge technical solutions for companies and accounting firms, streamlined financing, and a powerful ecosystem of partnerships, Fortnox stands as the vital hub for entrepreneurship in Sweden. Our vision: a prosperous society shaped by thriving businesses. Fortnox was established in 2001, with the main office in Växjö. For more information, visit fortnoxgroup.se.
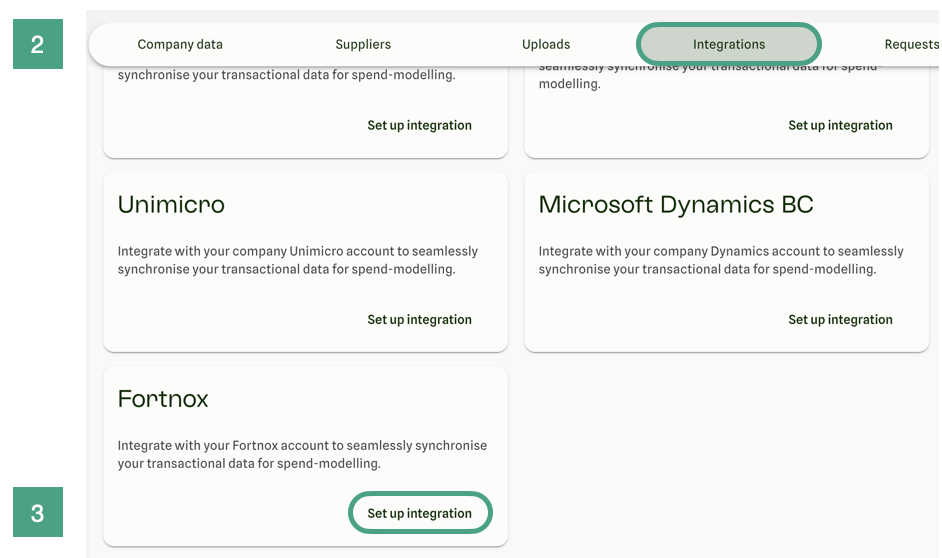
Setup Connection inside Morescope Application
Navigate to “Data” in the left side menu
Navigate to the "Integrations"-tab
Click "Set up integration" under Fortnox
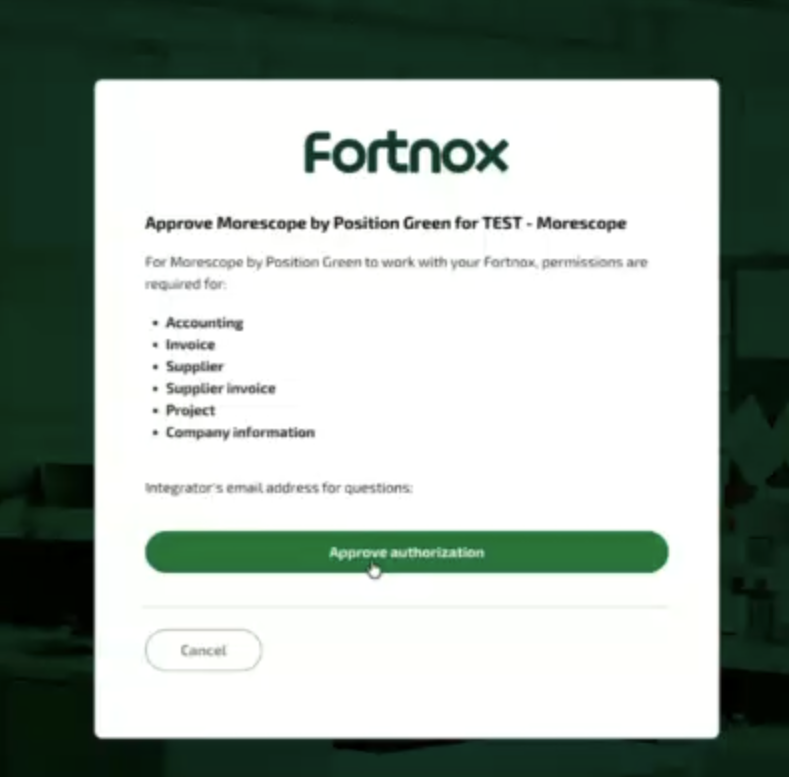
You will now see the Fortnox login page. Follow the instructions to log in and give Morescope access to your Fortnox accoun
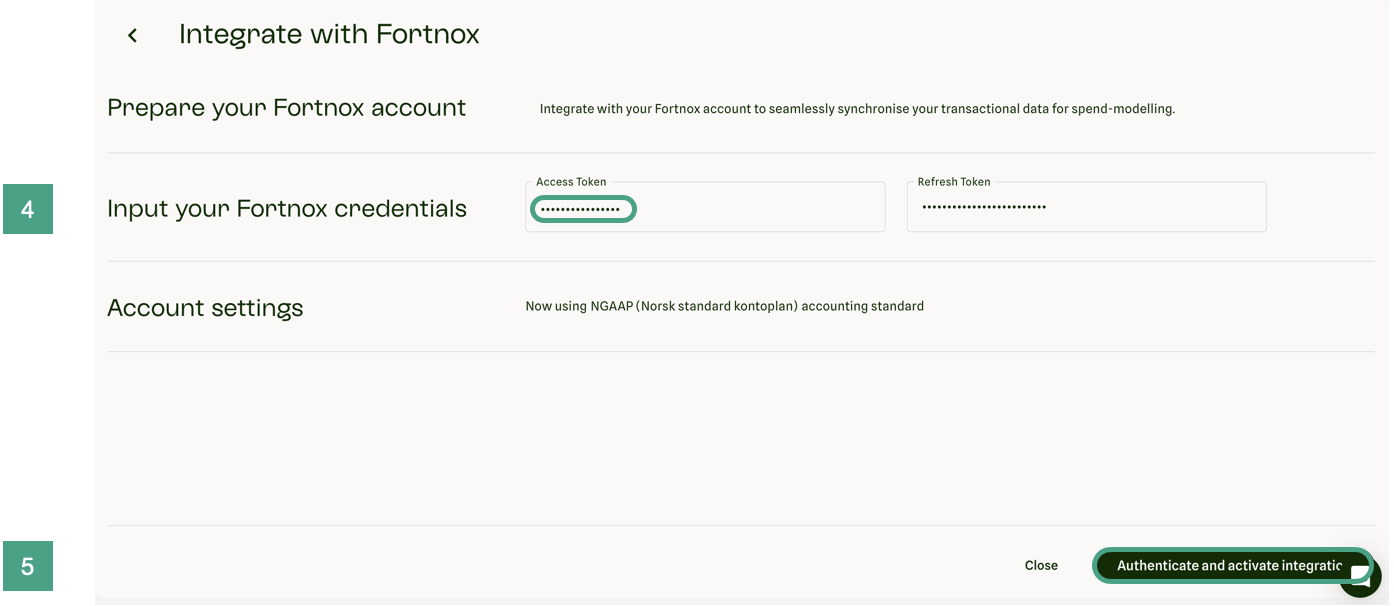
Click “Authenticate and activate integration”
/7. After clicking the button a check is made to see that the credentials given are correct. You should see a popup and the card saying “Authenticating credentials"
When the authentication is finished (usually takes about 30 seconds) you will se the card change to "Verified Credentials"
You will also get a popup in the top right saying that the authentication was completed.
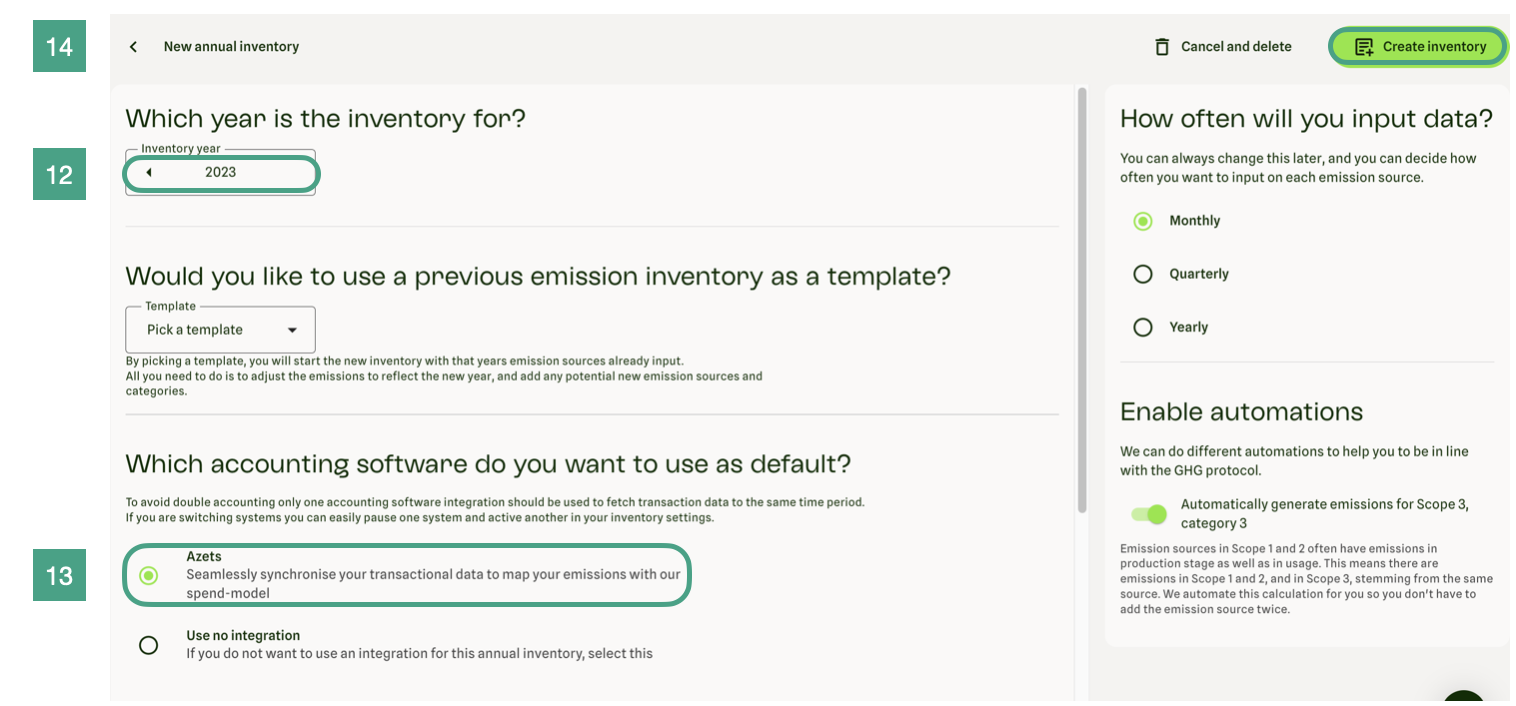
If you already created the inventory, skip steps 10 - 15
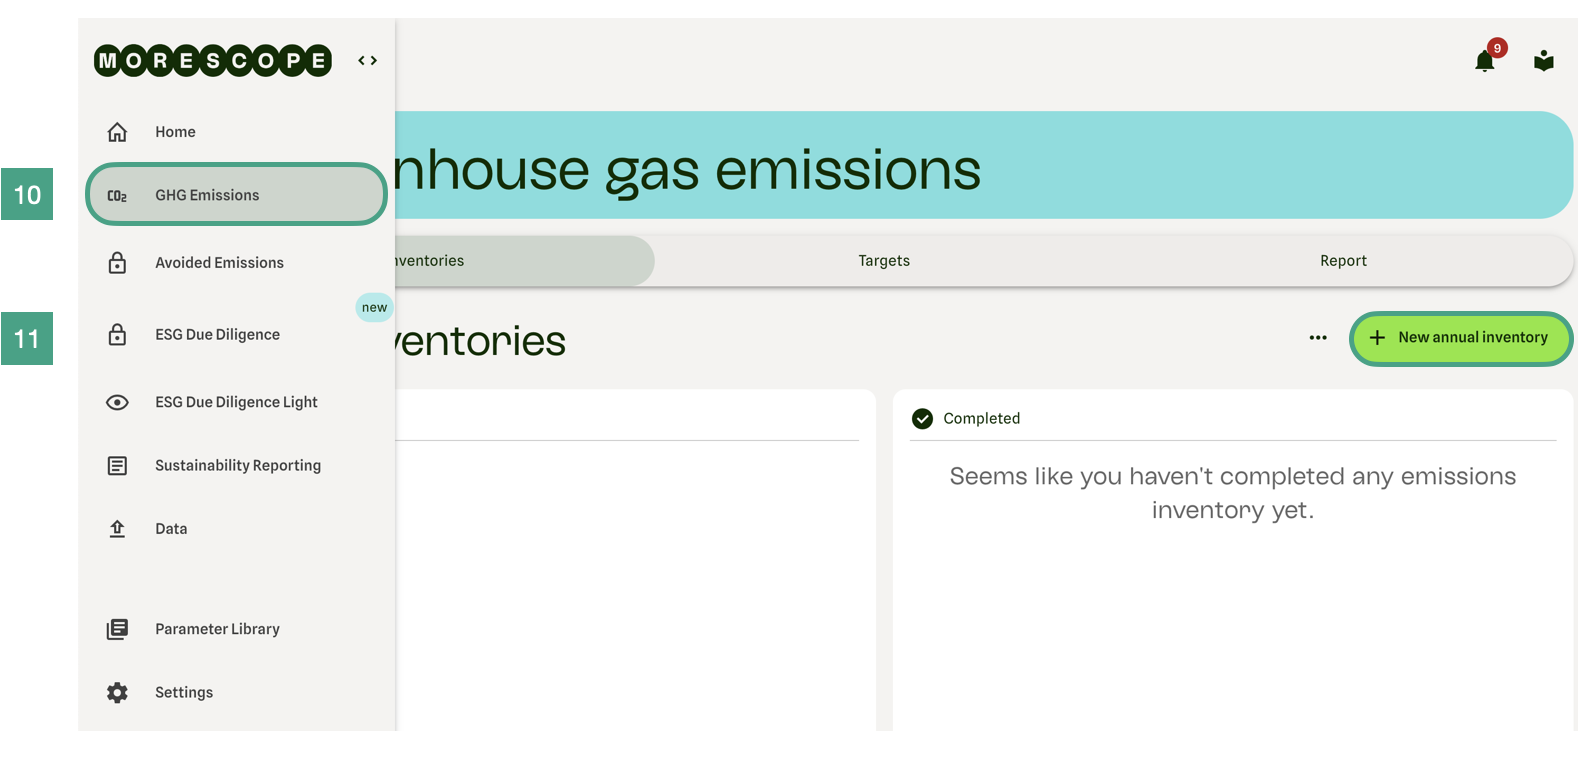
Navigate to GHG Emissions
Click “New Annual Inventory”
Select the year you want the inventory for
Select Fortnox as the accounting software you want to use.
Create Inventory. Your Transactions will automatically be fetched.
Congratulations. You are integrated!
If you have already followed steps 10 - 14 you can skip the rest of this guide.
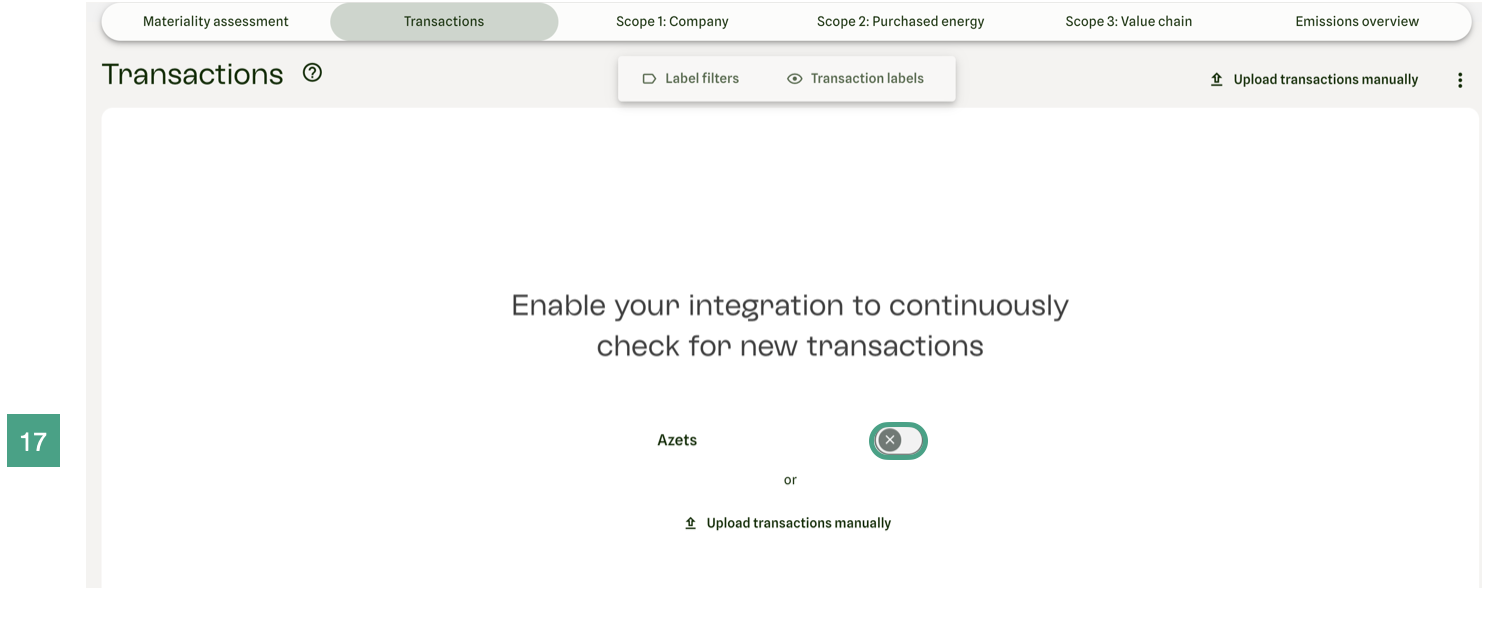
”Navigate to “GHG Emissions”
Click on the inventory you want to use the integration with and move to "Transactions"
Click on the toggle button for your integration
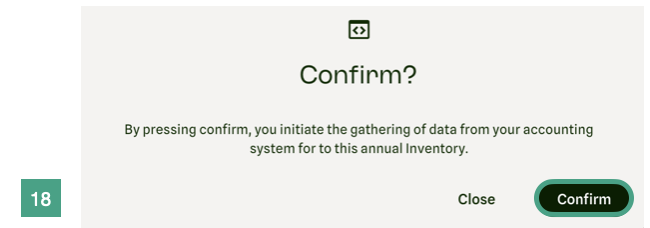
Click confirm. The fetching of data for the year will start.
By clicking “Accept All Cookies”, you agree to the storing of cookies on your device to enhance site navigation, analyze site usage, and assist in our marketing efforts. View our Privacy Policy for more information.


.png)


%20(1).JPG)


%201.JPEG)


.png)


.png)


